Table of Contents
When you visit a Guacamole instance for the first time, you will see the login screen. This screen authenticates you with Guacamole, allowing you to use Guacamole to interact with one or more remote desktops.
Enter your username and password and click "login". You will then be given a list of available remote desktop connections to choose from. If you have used Guacamole in that specific web browser before, you will also see thumbnails of the screens of recently used connections.
Keep in mind this is the login for Guacamole, and not necessarily the login for the remote desktop you wish to connect to. The username and password you give Guacamole grants you access to the Guacamole system only. The usernames and passwords required for the remote desktops you have access to through Guacamole are independent.
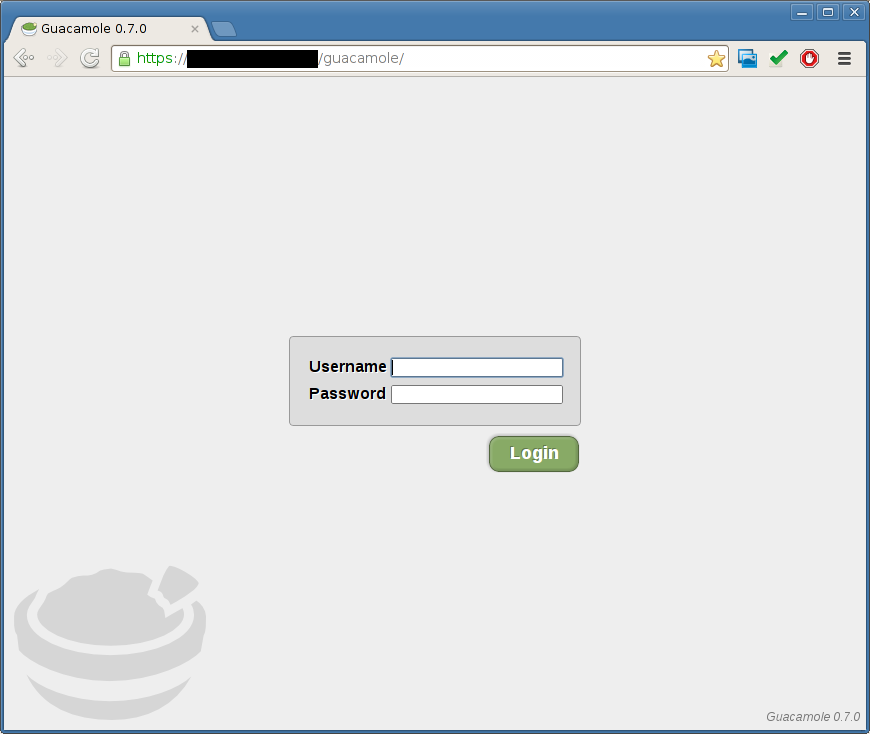
The Guacamole login screen.
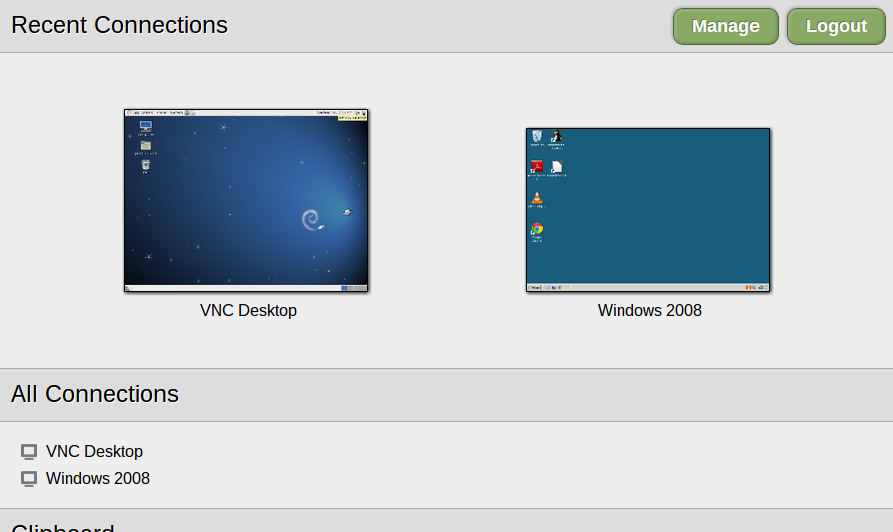
Once logged in, you will be presented with a list of connections. Selecting a connection from this list will open that connection in a new window or tab. The connection list interface will remain open and running in the previous window or tab, as it is the only access point for other connections, the clipboard, and settings.
Multiple connections can be used simultaneously.
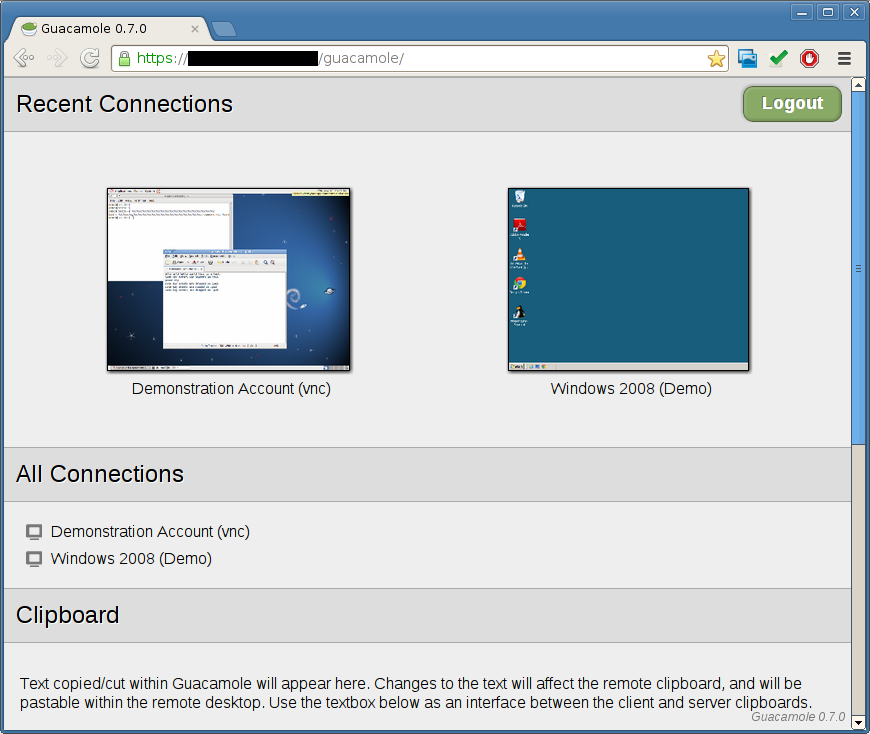
List of available connections.
If you don't wish to connect to any desktops, you can also logout from this screen by clicking the "logout" button. Beware that this will disconnect you from any of your open desktops, if you have any.
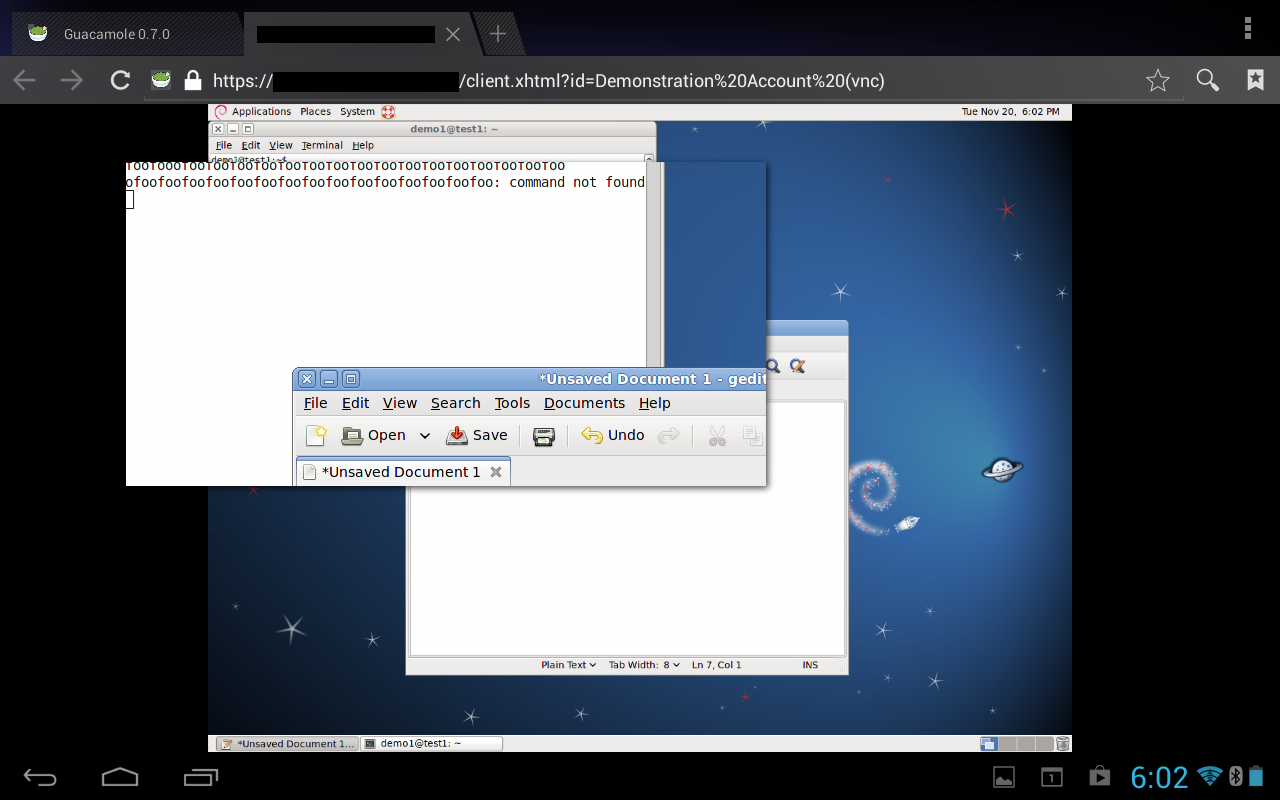
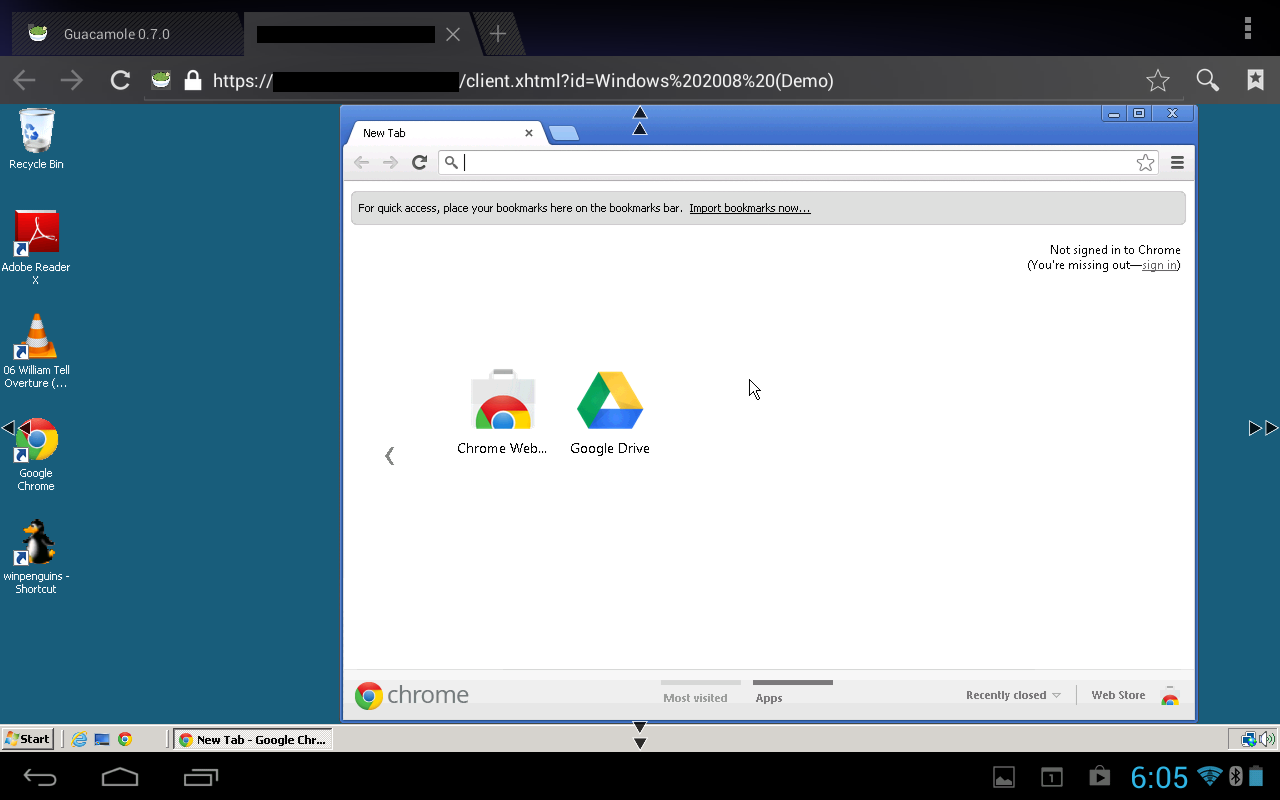
Once you open a connection, you will see an image of a desktop. You can interact with this image just as you would your normal desktop, or any remote desktop client.
Clicking on parts of the image will affect the remote desktop as if you were clicking on the desktop directly. Typing causes keys to be typed remotely as if you were using a keyboard connected directly to the remote machine.
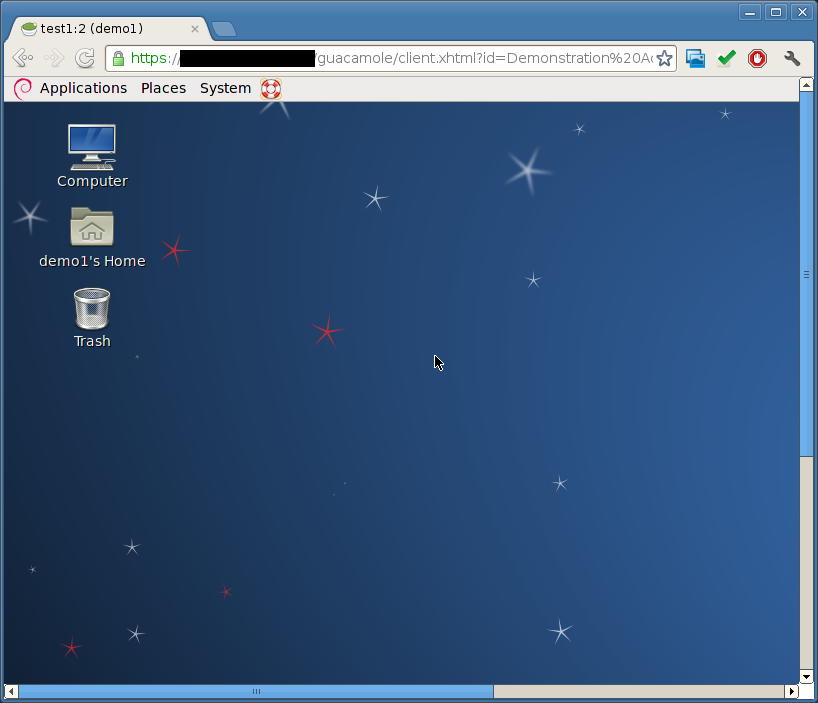
An active remote desktop.
The clipboard can be manipulated using the clipboard editor accessible near the bottom of the connection list interface.
Web browsers don't provide access to clipboard data, thus true synchronization between your local clipboard and the remote clipboard is impossible. Instead, the clipboard editor acts as an intermediary. You can paste text from your clipboard into the editor, and it will be sent to the remote clipboard. If you cut or copy text remotely, that text will be visible in the clipboard editor locally, where you can then select and copy it.
All open Guacamole connections use this common clipboard, thus copying and pasting between connections is seamless; you do not need to visit the clipboard editor to copy and paste from one connection to another.

The editable clipboard contents, accessible from the connection list interface.
Certain key combinations are impossible to press within a web application like Guacamole because they are reserved by the operating system (Ctrl-Alt-Del or Alt-Tab, for example) or by the web browser. If you press one of these reserved combinations, the effect will be observed locally, not remotely, and the remote desktop will receive only some of the keys.
Guacamole provides an on-screen keyboard such that key events can be sent to the remote machine without affecting the local browser. You can show the on-screen keyboard by pressing Ctrl-Alt-Shift. Pressing the Ctrl-Alt-Shift again will hide the on-screen keyboard.
Clicking on the buttons of the on-screen keyboard has the same effect as pressing the same buttons on a real keyboard, except that the operating system and browser will not intercept these keypresses; they will only be sent remotely.
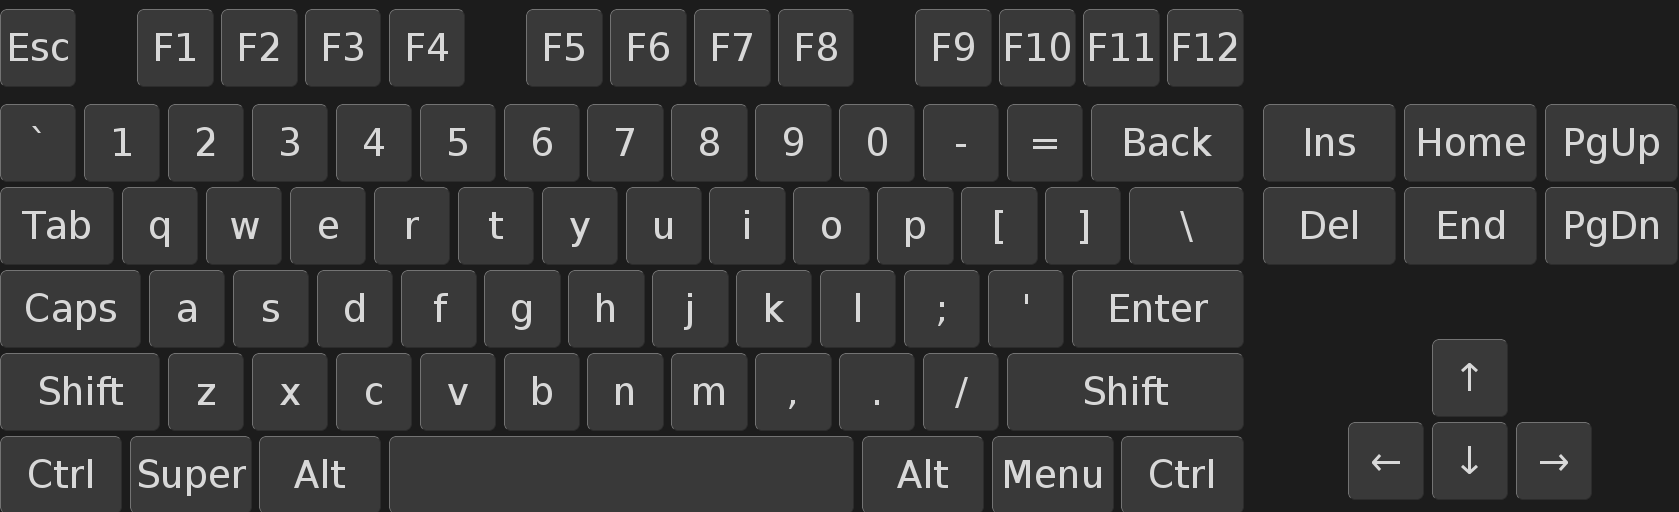
The on-screen keyboard.
Guacamole supports file transfer if it is enabled in the underlying protocol. Currently, both RDP and SSH have support for file transfer, though with slightly different semantics. RDP provides file transfer by emulating a virtual drive, while SSH provides file transfer by using SFTP.
To transfer files to the remote computer, drag the files into your browser window. If file transfer is enabled, you will see a notification popup showing upload progress. If file transfer is not enabled or not supported, you will instead see a notification with an error message describing the problem.
The method for downloading files from the remote computer depends on the protocol. In the case of RDP, you must drag, copy, move, or save the files into the special "Download" folder located in the virtual drive. All files dropped into this folder will automatically begin uploading to the client, and thus downloading through your browser.
To download files over SSH, you must use the guacctl utility. The guacctl utility is included with Guacamole, and allows you to initiate a file download or to change the directory in which uploaded files will be placed:
$guacctlguacctl 0.8.0, Guacamole SSH session control utility. Usage: guacctl [OPTION] [FILE]... -d, --download download each of the files listed. -s, --set-directory set the destination directory for future uploaded files.$guacctl -dFILENAME$guacctl -s$DIRECTORY
You may also create a symbol link or alias to guacctl called
guacget. When run as guacget, it behaves
as if the --download option was supplied and initiates a download
for each file specified on the command line.
When you are done and wish to logout of Guacamole completely, find the original connection interface tab and click the "logout" button. Beware that this will close all current connections and end your Guacamole session.
Note that this is not the same as disconnecting from a single connection. To disconnect, simply close the tab or window with the remote desktop in it. Closing a tab or window automatically disconnects from the associated remote desktop without logging you out of Guacamole completely.
If you logout of Guacamole, all active connections are closed, and can only be accessed by logging in again and reconnecting.
Guacamole can be used on devices that have touchscreens, even when those touchscreens are the sole means of input, such as most tablets and mobile phones.
As a finger makes for a very inaccurate pointing device, especially for mouse-driven applications designed for precise input, the default mode for touch-based mouse input in Guacamole is touchpad emulation.
Guacamole's touchpad emulation is similar in behavior to the touchpad present on most modern laptops. Drag your finger across the display to move the mouse pointer, and tap the display to left-click. Right-clicking is accomplished with a two-finger tap, and middle-clicking with a three-finger tap.
Click-and-drag by tapping the screen and then quickly placing your finger back down. This gesture only causes the mouse button to press down, but does not release it again until you lift your finger back up.
The mouse scroll wheel can be operated by dragging two fingers up or down.
Many touch-enabled devices have small screens, which makes the larger screens of a typical remote desktop hard to see and interact with. If you want to temporarily zoom in, long-press on the display. This will reveal a rectangular magnifier that can be dragged around the screen, revealing detail below it at full resolution.
The magnifier tool in use
Tapping outside this magnifier closes the magnifier, while tapping inside engages a typing mode.
In most cases, if your device has a hardware keyboard or you use a bluetooth keyboard, you will not need to do anything special in order to type; you can just press keys and expect the same effect you would have on a desktop.
For devices that lack a hardware keyboard, you need to bring Guacamole into "typing mode" by long-pressing on the display to bring up the magnifier. Tap on the magnifier to bring up your device's on-screen keyboard.
Because Guacamole uses all touch events to drive mouse input, the normal gestures for scrolling the screen will not work. Depending on how big your screen is, and whether the display is currently zoomed, you have three options for panning the screen:
-
Move the mouse
Moving the mouse beyond the bounds of the screen of the device will cause the display to automatically scroll until the mouse pointer is in view again. This will only work if the screen is not already fully visible.
-
Long-press to bring up panning mode
If the remote display is already fully visible, long-pressing will not bring up the magnifier, but will instead put Guacamole in a panning mode. Arrows will appear at the sides of the screen, and you can drag around the screen as normal. Tapping on the screen will put Guacamole in typing mode, allowing you to type and use your native on-screen keyboard (if any).
Panning mode
-
Bring up the magnifier, tap to put Guacamole in typing/panning mode, and then drag the screen
When in typing mode, dragging your finger on the screen will cause the screen to pan as it normally would. This is useful while typing, especially if what you're typing starts to run off the visible area of your device's screen.
Guacamole's settings section is located within the connection interface, and affects the behavior of all active and future Guacamole connections. Unless specified otherwise, changing a setting affects current Guacamole connections immediately.
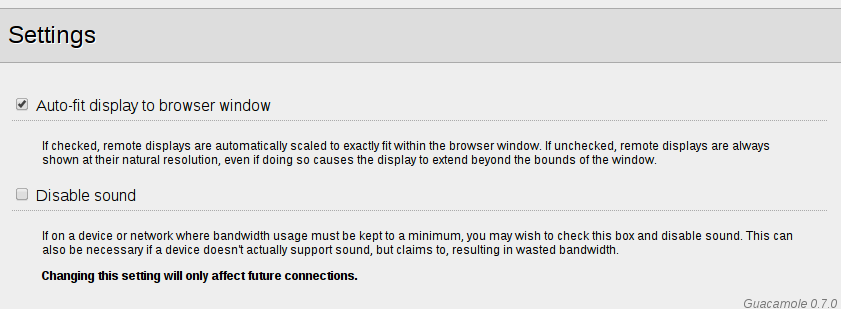
Guacamole settings, accessible from the connection list interface.
Sound can sometimes cause problems if your browser is too slow or if you lack sufficient network bandwidth. In some cases, browsers do not actually support sound, but misreport that they do to Guacamole, causing wasted bandwidth when Guacamole sends audio data that can't actually be played.
To disable sound, check the "Disable sound" checkbox in the settings section.
Normally, scrolling around the screen is troublesome and distracting if the remote display you're using is larger than the display of your device. Because of this, the remote display will automatically fit itself to the available space by default. If this is undesirable, you can manually disable this on a per-browser basis in the settings section.
To disable auto-fit, uncheck the "Auto-fit display to browser window" checkbox in the settings section.
Users and connections can be administered from within the web interface if the underlying authentication module supports this. The only officially-supported authentication module supporting this is the MySQL authentication provider, which is documented in a different chapter.
If you are using the default authentication mechanism, this section does not apply to you, and the Guacamole web interface will appear as it did in past releases. If, on the other hand, you are using the MySQL authentication provider, and you are logged in as an administrator, you will see a "Manage" button next to the "Logout" button at the top of the screen.
The "Manage" button
Clicking this button takes you to an administration screen where you can add or manipulate users and connections, depending on your permissions.
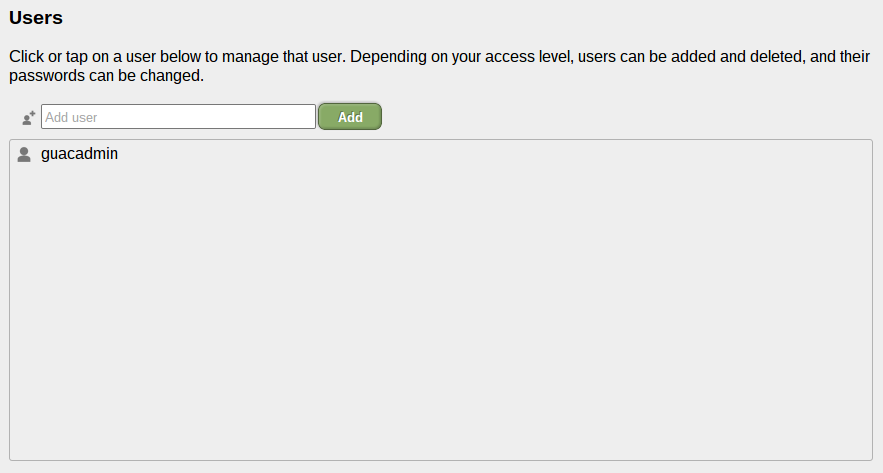
Once at the administration screen, you will see two sections displaying all visible users and connections. The visibility of these sections depends on your user's permissions. If you lack permission to manage users, the user management section will not display. The same goes for management of connections.
To add a new user, type the username of the new user within the text box inside the user management section, and click the "Add" button. The new user will be added and made available. The new user will have no access to any existing connections, no administrative privileges, and no password, and will not be able to login. You will need to set the user's password first in order to allow login.
User management interface
To edit a user, just click on the user you wish to edit. A small dialog will display allowing you to change the user's password, add or remove administrative permissions, and add or remove access to specific connections or groups.
If you have delete permission on the user, you will also see a "Delete" button. Clicking this button will permanently delete the user.
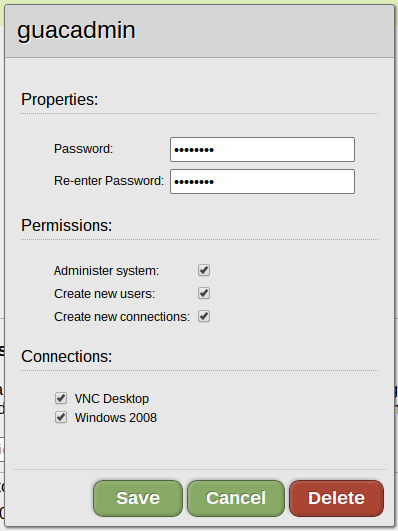
Editing a user
To add a new connection, click the "New Connection" button. A connection creation dialog will appear, allowing you to enter the details of the connection, such as its location, parameters, and name. This name should be descriptive, but must also be unique.
Once you click "Save", the new connection will be added, but will initially only be usable by administrators and your current user. To add access to the new connection to another existing user, you must edit that user, checking the box corresponding to the new connection.
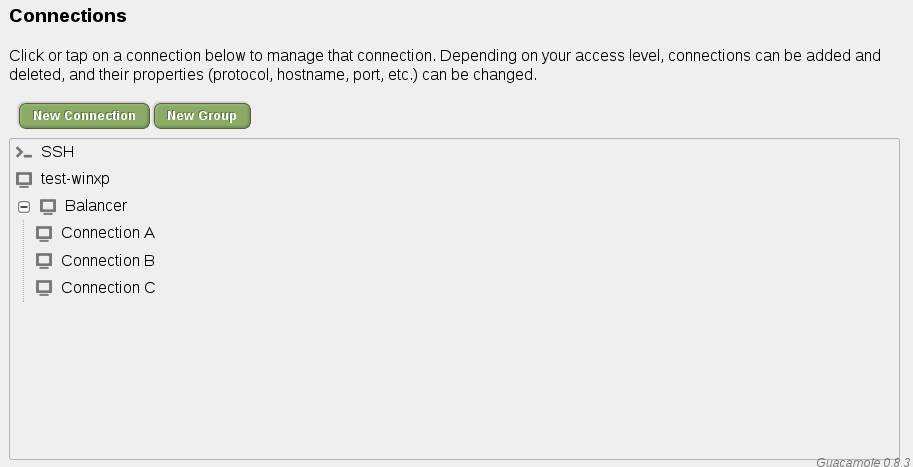
Connection management interface
Editing a connection works identically to editing a user. Click on the connection you wish to edit. A dialog will pop up displaying all parameters associated with the connection, allowing you to change the protocol, associated parameters, and to view the connection history.
Connections can also be renamed or moved by altering the contents of the "Name" or "Location" fields.
If you have delete permission on the connection, you will also see a "Delete" button. Clicking this button will permanently delete the connection.
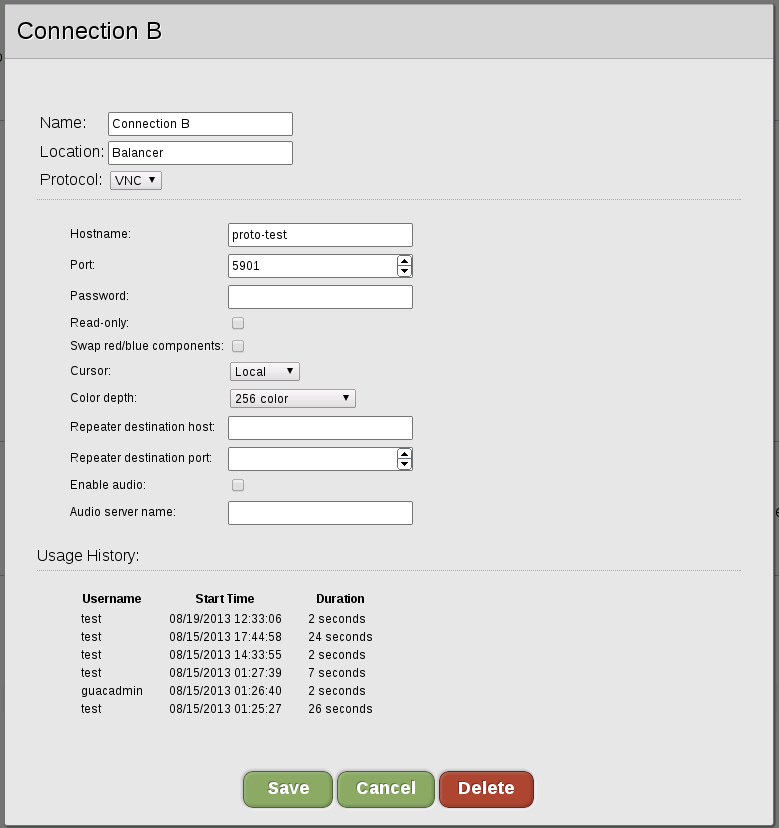
Editing a connection
Connections can be placed within groups for purposes of organization or load balancing. Each group is displayed in connection lists as a "+" symbol followed by its name. The group can be expanded revealing any contained connections or groups. If the group is a balancing group, the group can be used as a connection, and the least-used contained connection will be used.
To add a new connection group, click the "New Group" button. A connection group creation dialog will appear, allowing you to enter the details of the group. Just as with connections, you can enter the location and name, which should be descriptive and unique. Duplicate names are not allowed.

Editing a connection group
You can edit existing connection groups by clicking on them within the administration interface, just like with users and connections. From within the dialog that appears, you can rename, move, and change the properties of existing connection groups.
Connection groups can be either "organizational" or "balancing". Each group can contain any number of other connections or groups, but the semantics of the group change depending on the type.
An organizational group behaves exactly as a folder or directory in a file system. It simply contains connections and other groups, but provides no other behavior. Clicking on an organizational group within a connection list will expand the group, revealing its contents.
A balancing group behaves as a connection. It dynamically balances load across the connections it contains, choosing the connection with the fewest number of active users. Unlike organizational groups, clicking on a balancing group causes a new connection to be opened. The actual underlying connection used depends on which connection has the least load at the time the group was clicked.